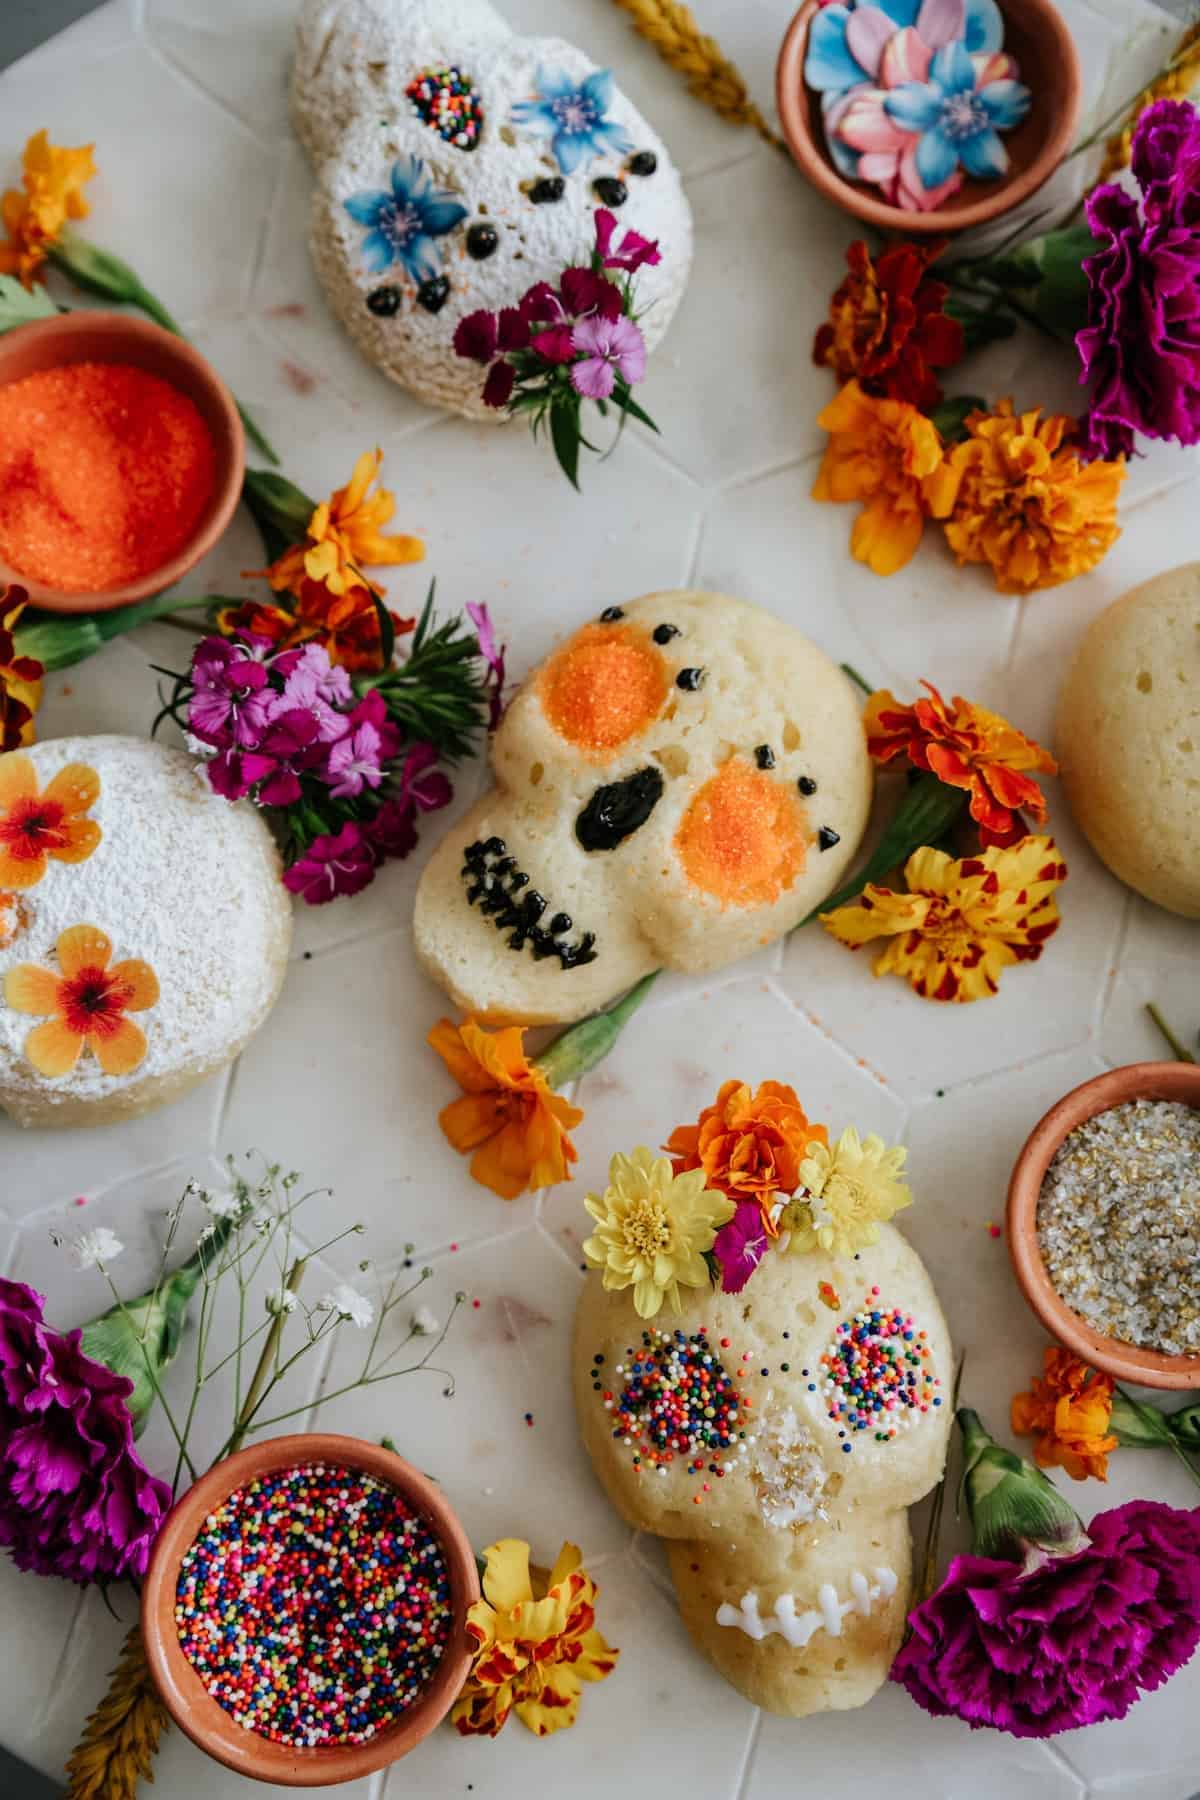
As the air begins to cool and vibrant leaves crunch underfoot, my thoughts drift toward the festive spirit of Día de los Muertos. It was while rummaging through some old recipes that I stumbled upon the colorful tradition of creating Sugar Skulls a celebration of life and remembrance that blends artistry with sweet indulgence. These intricate delights not only bring a pop of color to any table but also allow for personal expression, making each one uniquely yours.
Whether you’re looking to honor loved ones or simply want to impress guests with your creative flair, this Sugar Skull recipe will guide you through each step with ease and joy. With just a handful of simple ingredients and a bit of patience, you’ll find the process as rewarding as the beautiful, delicious results. So, let’s dive in and create something truly special that captures the spirit of celebration while satisfying the sweet tooth!
Why are Sugar Skull treats so special?
Sugar Skull treats are a delightful way to celebrate life’s moments with creativity and flavor. Colorful designs: Each skull can be customized, allowing for endless artistic expression. Easy to make: With straightforward ingredients and steps, even novice bakers can create stunning treats. Cultural significance: These sweets honor the rich traditions of Día de los Muertos, turning baking into a heartfelt tribute. Crowd-pleaser: Perfect for gatherings, they’re sure to impress guests and spark conversations. Dive in and make these treats the highlight of your celebration!
Sugar Skull Ingredients
• Get ready to create tasty memories!
For the Sugar Skull Base
- Granulated sugar – This is the star ingredient, allowing your Sugar Skull to hold its shape and sweetness.
- Meringue powder – Acts as a binding agent, ensuring your skulls have a sturdy structure.
- Water – Essential for mixing, use sparingly to achieve the right consistency for your dough.
For Decorating
- Royal icing – A must for adding decorative details; it hardens beautifully for a professional finish.
- Gel food coloring – Use this to create vibrant hues, bringing your Sugar Skull designs to life.
- Edible glitter – For that extra sparkle, making your treats stand out at any spooktacular celebration.
These Sugar Skull ingredients will transform simple baking into an artistic expression, perfect for honoring those we cherish.
How to Make Sugar Skull Treats
- Prepare the Sugar Mixture: In a large bowl, combine your granulated sugar and meringue powder. Mix well until fully combined, and ensure the dry ingredients are evenly distributed for the best texture.
- Add Water Gradually: Slowly sprinkle in water, a tablespoon at a time, stirring continuously. You want a consistency similar to damp sand. It should hold its shape when squeezed; this is crucial for molding.
- Mold the Skulls: Press the sugar mixture firmly into your skull molds. Make sure to compact it well, filling each cavity to the top, and scrape off any excess. Let it sit at room temperature for at least 12 hours to harden.
- Unmold with Care: Once set, gently tap the molds to release the Sugar Skulls. If they don’t come out easily, give them a little shake; patience is key here!
- Prepare Royal Icing: In a mixing bowl, whisk your royal icing until it reaches a thick consistency. This will be used for decorating, so ensure it can hold its shape and create beautiful designs.
- Color Your Icing: Divide the royal icing into separate bowls and add gel food coloring. Mix until you achieve your desired vibrant shades, ready to bring your Sugar Skulls to life.
- Decorate Your Skulls: Use piping bags or a simple zip-top bag with a snipped corner to add your colored icing onto the skulls. Let your creativity flow with patterns, flowers, and any personal touches!
- Add Edible Glitter: To make your Sugar Skulls sparkle, gently sprinkle edible glitter on top of the icing while it’s still wet. This adds a magical finish perfect for the celebration!
Optional: Use metallic food pens for extra detailing on your decorated skulls.
Exact quantities are listed in the recipe card below.
Tips for the Best Sugar Skull Treats
- Temperature Matters: Ensure your ingredients are at room temperature before mixing; this helps the sugar blend smoothly for a perfect consistency in your Sugar Skull base.
- Correct Mold Use: Fill the molds tightly and level off excess sugar to avoid cracks while unmolding. A well-packed mold ensures beautiful shapes that stay intact.
- Patience is Key: Allow the molded Sugar Skulls to set properly for at least 12 hours. Rushing this step may compromise their sturdiness, leading to breakage.
- Icing Consistency: When preparing royal icing, aim for a thick but spreadable consistency—it should hold peaks but still be smooth enough for intricate designs.
- Creative Freedom: Don’t hesitate to experiment with colors and designs! Each Sugar Skull is an opportunity for personal expression, so let your imagination shine.
These tips will help ensure your Sugar Skull treats turn out not only delicious but also visually stunning for your festive celebration!
How to Store and Freeze Sugar Skull
Room Temperature: Store your Sugar Skulls in an airtight container at room temperature for up to 2 weeks. Keep them away from direct sunlight to maintain color vibrancy.
Fridge: If you want to extend freshness, refrigerate the Sugar Skulls in a sealed container for up to 4 weeks. Let them come to room temperature before serving.
Freezer: For longer storage, you can freeze the Sugar Skulls for up to 3 months. Wrap them individually in plastic wrap, then place in a freezer-safe container.
Reheating: There’s no need to reheat. Simply thaw frozen Sugar Skulls in the fridge overnight, then enjoy their delightful sweetness at room temperature.
Keeping these storage tips in mind will help your Sugar Skull treats remain as delightful as the day you made them!
Sugar Skull Variations & Substitutions
Feel free to get creative with your Sugar Skulls and make them your own!
- Gluten-Free: Substitute regular granulated sugar with gluten-free sugar to accommodate dietary needs without compromising sweetness.
- Dairy-Free Icing: Use non-dairy milk instead of regular milk in your royal icing for a creamy texture perfect for decorating.
- Flavor Infusion: Add a splash of almond or vanilla extract to the sugar mixture for a hint of flavor that enhances the sweetness.
- Bright and Bold Colors: Experiment with different gel food coloring brands for unique shades; combine colors for a marbled effect and festive designs!
- Texture Twist: For a crunchy element, sprinkle crushed nuts or edible flowers on top of the wet icing, adding both texture and visual appeal.
- Chili Spice: For a surprising kick, mix a dash of chili powder into your sugar base or royal icing. It adds warmth and excitement to the sweet!
- Themed Designs: Tailor your decorations to fit various celebrations, like Christmas or birthday themes, using appropriate colors and shapes for any occasion!
With these fun variations and substitutions, your Sugar Skulls will not only reflect your unique personality but will also cater to different tastes and preferences!
What to Serve with Sugar Skull Treats?
Create a memorable celebration by pairing these vibrant delights with complementary dishes and drinks that capture the spirit of Día de los Muertos.
- Spiced Hot Chocolate: Rich and creamy, this warm drink enhances the sweetness of your Sugar Skulls while adding a comforting touch.
- Pan de Muerto: This traditional bread, soft and slightly sweet, offers a delightful textural contrast and cultural significance that ties beautifully to your theme.
- Fruit Salad with Lime: Fresh, zesty fruit can balance out the sweetness of the Sugar Skulls, making each bite feel refreshing and light.
- Cinnamon Sugar Tortilla Chips: Crispy and sweet, these can be a fun and interactive addition for dipping in chocolate or scooping up fruity salsas.
- Mexican Horchata: A creamy, cinnamon-infused rice drink, horchata offers a deliciously cool palate cleanser against the sugariness of the treats.
- Candied Almonds: Crunchy and lightly sweet, these nuts provide a nutty flavor that enhances the festive feel without overpowering the Sugar Skulls.
- Churros with Chocolate Sauce: These warm, cinnamon-dusted pastries create a delightful sweet experience, perfect for every guest to indulge in after their Sugar Skull treat.
This array of pairings not only celebrates the flavors of the season but also invites shared joy and creativity around your festive table.
Make Ahead Options
These Sugar Skull treats are perfect for busy home cooks looking to save time during festive celebrations! You can prepare the sugar mixture and mold the skulls up to 24 hours in advance; just cover them tightly to prevent drying out. After they’ve set, store the unmolded skulls in an airtight container at room temperature for up to 3 days. When you’re ready to decorate, whip up the royal icing and color it just before serving, ensuring it stays fresh and vibrant. This way, you can focus on your creativity without the last-minute rush, resulting in beautiful, artistic treats that are just as delicious as they are stunning.
Sugar Skull Recipe FAQs
How do I select the best ingredients for Sugar Skull treats?
Absolutely! When choosing your ingredients, opt for granulated sugar that is fine without any clumps, as this ensures easy mixing. For meringue powder, look for a brand without added preservatives for the best binding properties. Lastly, consider using gel food coloring over liquid, as it provides more vibrant colors without altering your icing consistency.
How should I store my Sugar Skull treats?
For sure! Store your Sugar Skulls in an airtight container at room temperature for up to 2 weeks. This prevents them from absorbing moisture and losing their beautiful designs. If you want to keep them longer, pop them in the fridge for up to 4 weeks, just make sure they’re in a sealed container to avoid absorbing any odors.
Can I freeze Sugar Skull treats?
Yes, you can freeze them! Wrap each Sugar Skull individually in plastic wrap, ensuring no air can get to them, then place them in a freezer-safe container. They will stay fresh for up to 3 months. When you’re ready to enjoy them, simply thaw them in the fridge overnight, then let them come to room temperature. This way, they’ll taste just as delightful!
What should I do if my Sugar Skulls crack during unmolding?
No worries! If your Sugar Skulls crack, it might be due to overpacking or inadequate drying time. To fix this, gently press the cracked pieces back together if they are still moist. For future batches, ensure you compact the sugar mixture properly in the molds and allow them a full 12 hours to set perfectly. Patience truly pays off!
Are Sugar Skull treats safe for pets and those with allergies?
Great question! Sugar Skulls are primarily made with sugar and meringue powder, which are not toxic to pets; however, they shouldn’t be fed to them due to the high sugar content. Additionally, always check for allergens like eggs (in some meringue powders) if you or your guests have dietary restrictions. Opting for egg-free meringue powder may be a safer choice for those with egg allergies!
What can I do if my royal icing is too thin?
Very easily! If your royal icing turns out too runny, here’s what you can do: Gradually add more powdered sugar a tablespoon at a time while mixing until you reach a thick but spreadable consistency. You want it to hold peaks that don’t flatten out on their own, which is perfect for creating beautiful decorative designs on your Sugar Skulls!
Delicious Sugar Skull Treats for a Spooktacular Celebration
Ingredients
Equipment
Method
- In a large bowl, combine your granulated sugar and meringue powder. Mix well until fully combined.
- Slowly sprinkle in water, a tablespoon at a time, stirring continuously to achieve a damp sand-like consistency.
- Press the sugar mixture firmly into your skull molds and let it sit at room temperature for at least 12 hours.
- Gently tap the molds to release the Sugar Skulls once set.
- Whisk your royal icing until it reaches a thick consistency for decorating.
- Divide the icing into bowls and add gel food coloring, mixing until vibrant colors are achieved.
- Use piping bags to add colored icing onto the skulls, allowing for personal creative designs.
- Sprinkle edible glitter on top of the icing while it's still wet for a magical finish.


